Setting Up a VIDA Upload Connection Using Aspera
Connect IBM Aspera to VIDA's upload server so you can transfer content as a supplier.
Overview
This guide explains how to connect IBM Aspera to VIDA's upload server and transfer content. It is intended for content suppliers who have been given Aspera credentials by the VIDA onboarding team.
If you are uploading content via Launchpad, see our Uploading files with the Aspera for Desktop App guide instead. If you are downloading from our Downloads Page, see our Downloading Files using IBM Aspera for Desktop guide instead.
Before You Begin
Aspera credentials from the VIDA onboarding team – a server address, and a username/password (sometimes labelled Key ID and Secret).
Which application do I need?
Download and install IBM Aspera for Desktop from IBM.
If you already have IBM Aspera Desktop Client installed, see the legacy instructions below – this application has been retired and is no longer available for download.
Step-by-Step Instructions
IBM Aspera for Desktop
Before you start – disable Multi Session
Open Settings (the cog icon in the left sidebar) and scroll to the Multi-session section under Transfers. Ensure Enable multi-session is unchecked.
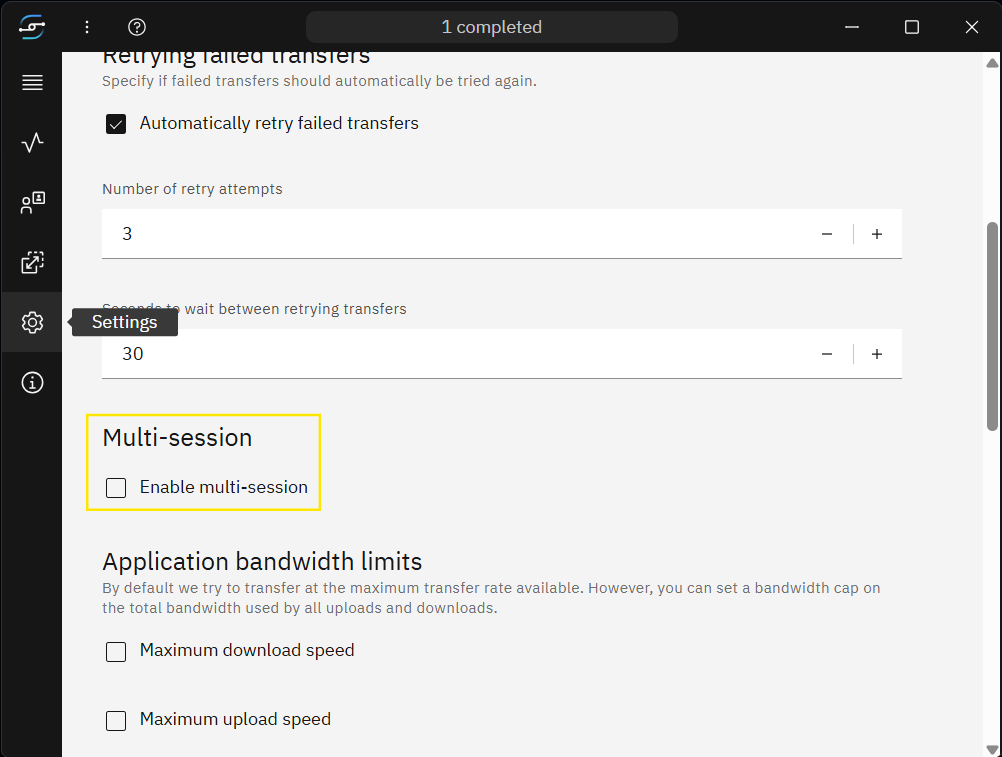
This is a requirement of VIDA's server and is necessary for stable transfers.
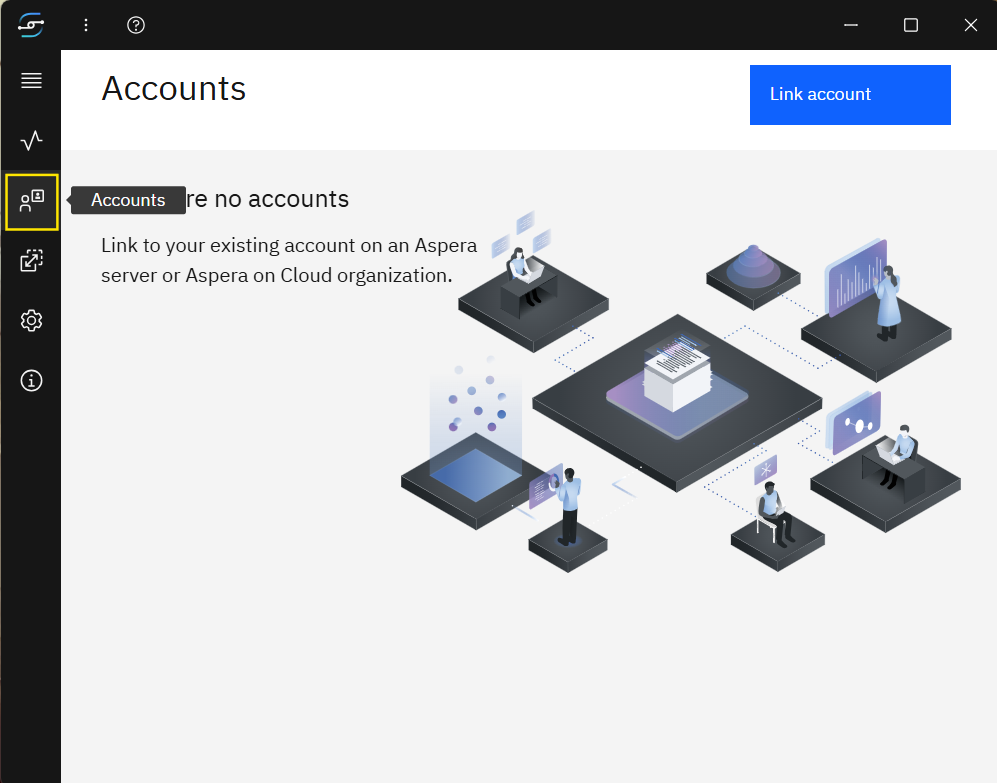
Step 1 – Open the Accounts tab
Open IBM Aspera for Desktop and select the Accounts icon from the left sidebar. The Accounts page will show any existing linked accounts. If this is your first time, it will be empty.
Step 2 – Link an account
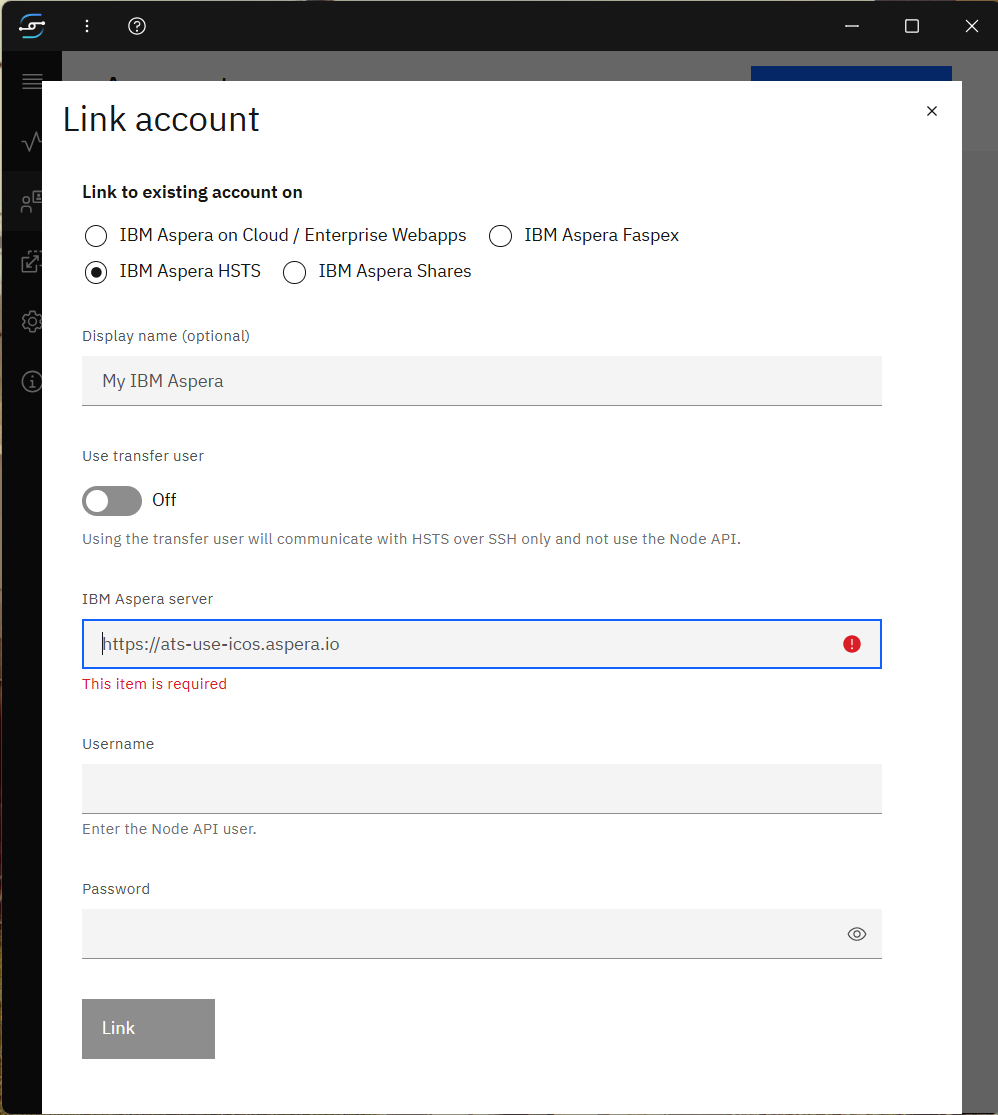
Click the blue Link account button. In the Link account window:
- Select IBM Aspera HSTS.
- Enter a Display name – this is optional but recommended. Use something descriptive, such as
VIDA Upload. - Leave Use transfer user set to Off.
- Enter the IBM Aspera server address provided by the VIDA onboarding team.
- Enter your Username and Password – these will be provided by the onboarding team and may be labelled Key ID and Secret.
Once all required fields are filled in, the Link button will turn blue. Click Link.
Step 3 – Open your account
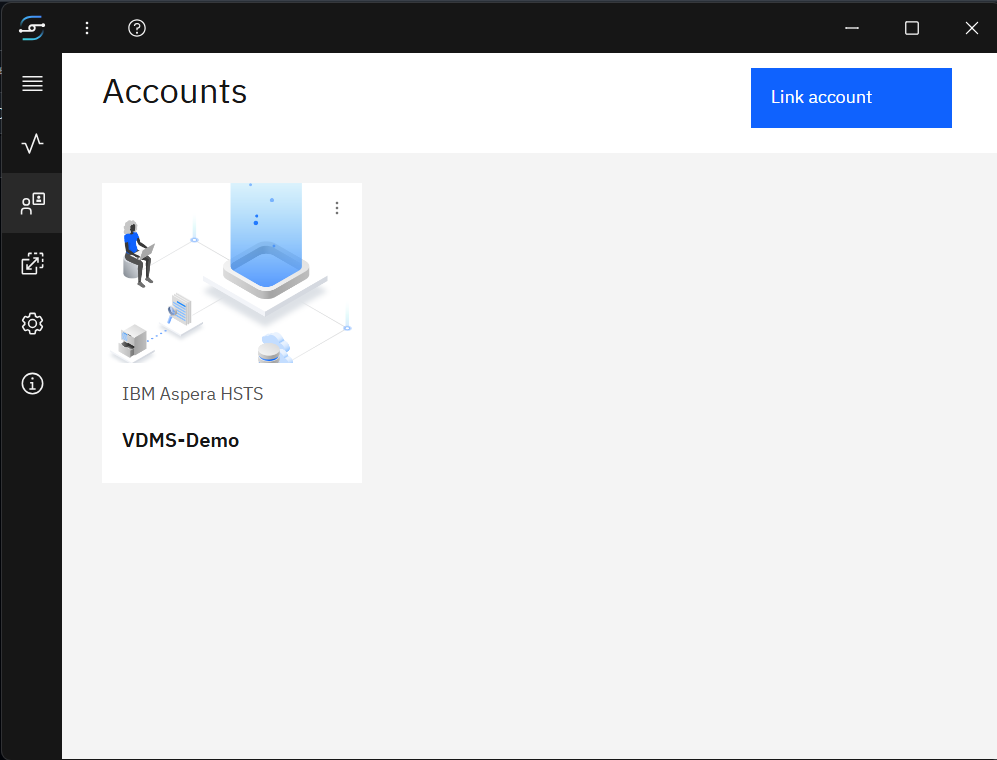
After linking, you will be returned to the Accounts page where the new account will appear. Click the account name to open it.
Step 4 – Upload files
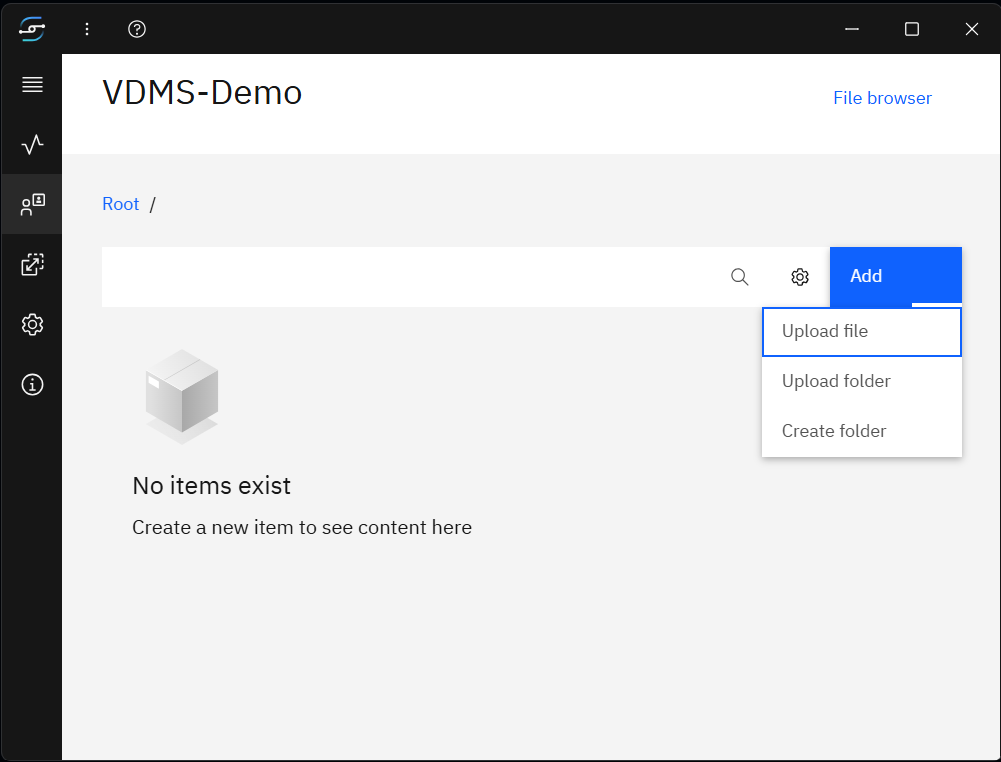
You will land in the root folder of your account. Use the blue Add button to upload content:
- Upload file – select one or more individual files.
- Upload folder – select an entire folder.
- Create folder – create a folder to organise your uploads before transferring.
Step 5 – Monitor your transfer
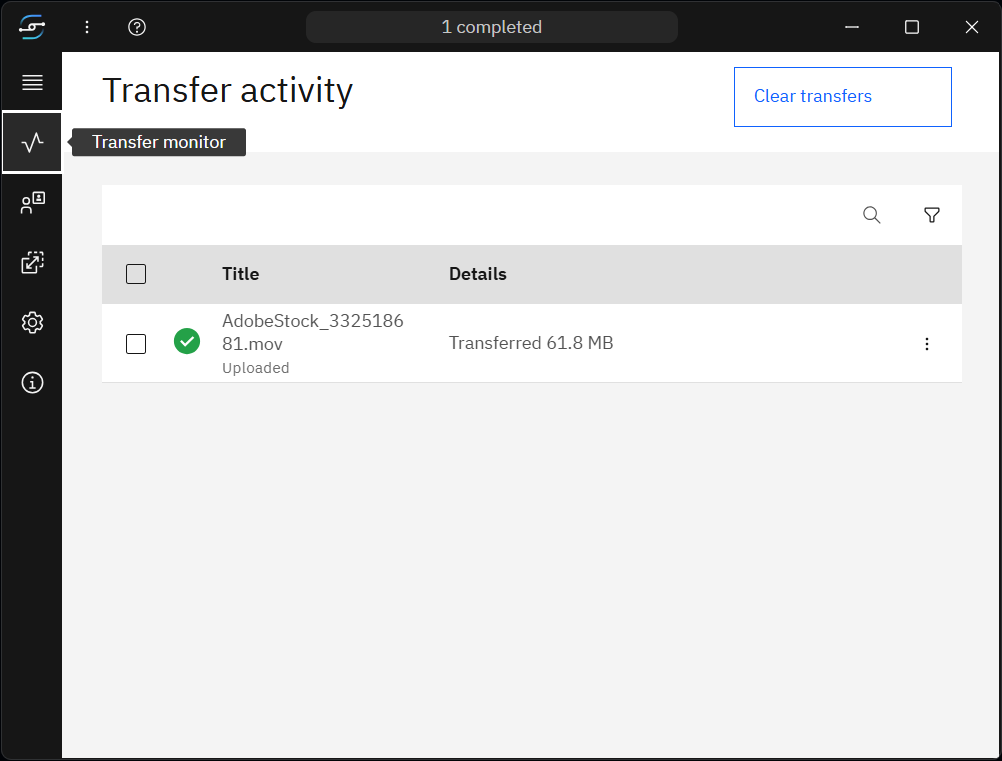
Select the Transfer monitor icon from the left sidebar to watch progress. When a transfer completes it will show a green tick, the file name, and the total amount of data transferred. Multiple files can transfer at the same time.
Your file will also appear in the account folder view once the upload has finished.
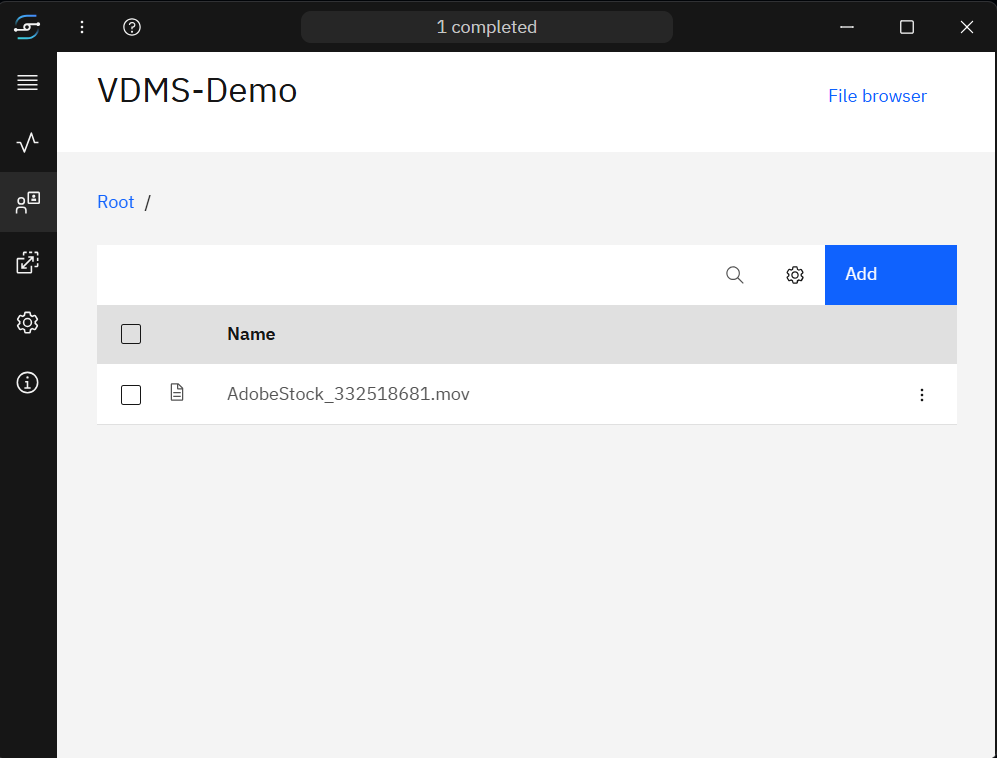
Once VIDA has ingested your files they will be removed from this folder. This is expected – it confirms your content has been picked up successfully.
IBM Aspera Desktop Client (Legacy)
IBM Aspera Desktop Client has been retired and is no longer available for download. If you still have it installed, the steps below apply. We recommend upgrading to IBM Aspera for Desktop.
Step 1 – Open the Connections panel
Launch IBM Aspera Desktop Client. Once open, click the Connections icon.

Step 2 – Create a new connection
In the Connection Manager, click the plus ( + ) symbol to add a new connection.
If you have received updated credentials for an existing connection, select that connection to edit it instead.

Step 3 – Enter your connection details

| Field | Where to find the value |
|---|---|
| Host | The server address (starting https://) provided by VIDA |
| User | The value in quotes after "id": in your provided credentials |
| Password | The value in quotes after "secret": in your provided credentials |
Click Test Connection to confirm the connection is working, then save.
Troubleshooting & FAQs
Contact your local IT team and ask them to whitelist VIDA's Aspera server details. This is a network-level restriction on your side and cannot be resolved by VIDA support.
Double-check that you have copied the credentials exactly as provided. For the Desktop Client, include only the text within the quotes, not the quotes themselves.
If you need further assistance, use the Submit a Ticket button at the top of this page.
Related Articles
Was this article helpful?
That’s Great!
Thank you for your feedback
Sorry! We couldn't be helpful
Thank you for your feedback
Feedback sent
We appreciate your effort and will try to fix the article