First-Time Login to VIDA: Setting Up Two-Factor Authentication (2FA)
Set up two-factor authentication with an authenticator app the first time you log in to VIDA, Launchpad, or Connect 2.
Overview
To keep your account and content secure, VIDA requires two-factor authentication (2FA) for all users. 2FA adds a strong, additional layer of protection on top of your email address, making it much harder for anyone else to access your account.
Two-factor authentication means you need two things to log in: something you know (your email address) and something you have (your mobile phone, using an authenticator app).
Instead of sending a code by text message, VIDA uses an authenticator app. This app generates a six-digit code on your phone that refreshes every 30 seconds. You enter the current code when prompted to confirm it's really you.
Setting up 2FA is required before you can access VIDA, Launchpad, or Connect 2.
You only need to set up 2FA once. The same setup applies whether you have access to VIDA, Launchpad, Connect 2, or more than one — you won't need to repeat this process for each product.
Before You Begin
- Your VIDA account email address.
- A smartphone (iOS or Android).
- An authenticator app installed on your phone — such as Google Authenticator, Microsoft Authenticator, or Authy. All major authenticator apps are supported.
Step-by-Step Instructions
Step 1 — Log in to VIDA, Launchpad, or Connect 2
- Open the login page for the correct product using the link provided in your email.
- Enter your email address.
- Select Login.
On your first login, VIDA will automatically prompt you to set up two-factor authentication.
Step 2 — Choose how to set up 2FA
When prompted, select Authenticator App. This is the recommended option and provides the best experience.
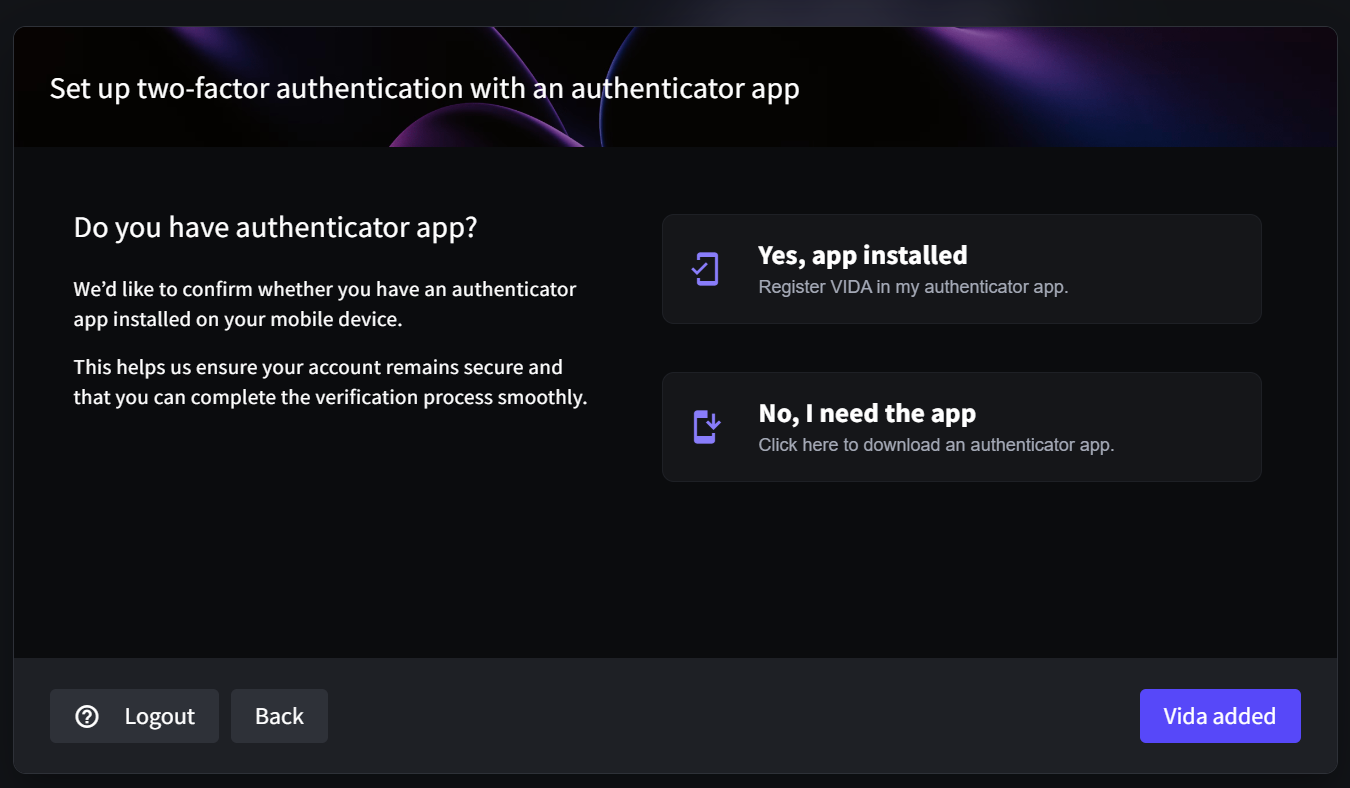
Step 3 — Confirm whether you have an authenticator app
You'll be asked: "Do you already have an authenticator app installed?"
- If you already have an app installed, select "Yes, app installed" and continue to Step 4.
- If you do not have an app installed, select "No, I need the app" and follow the on-screen instructions to install one.
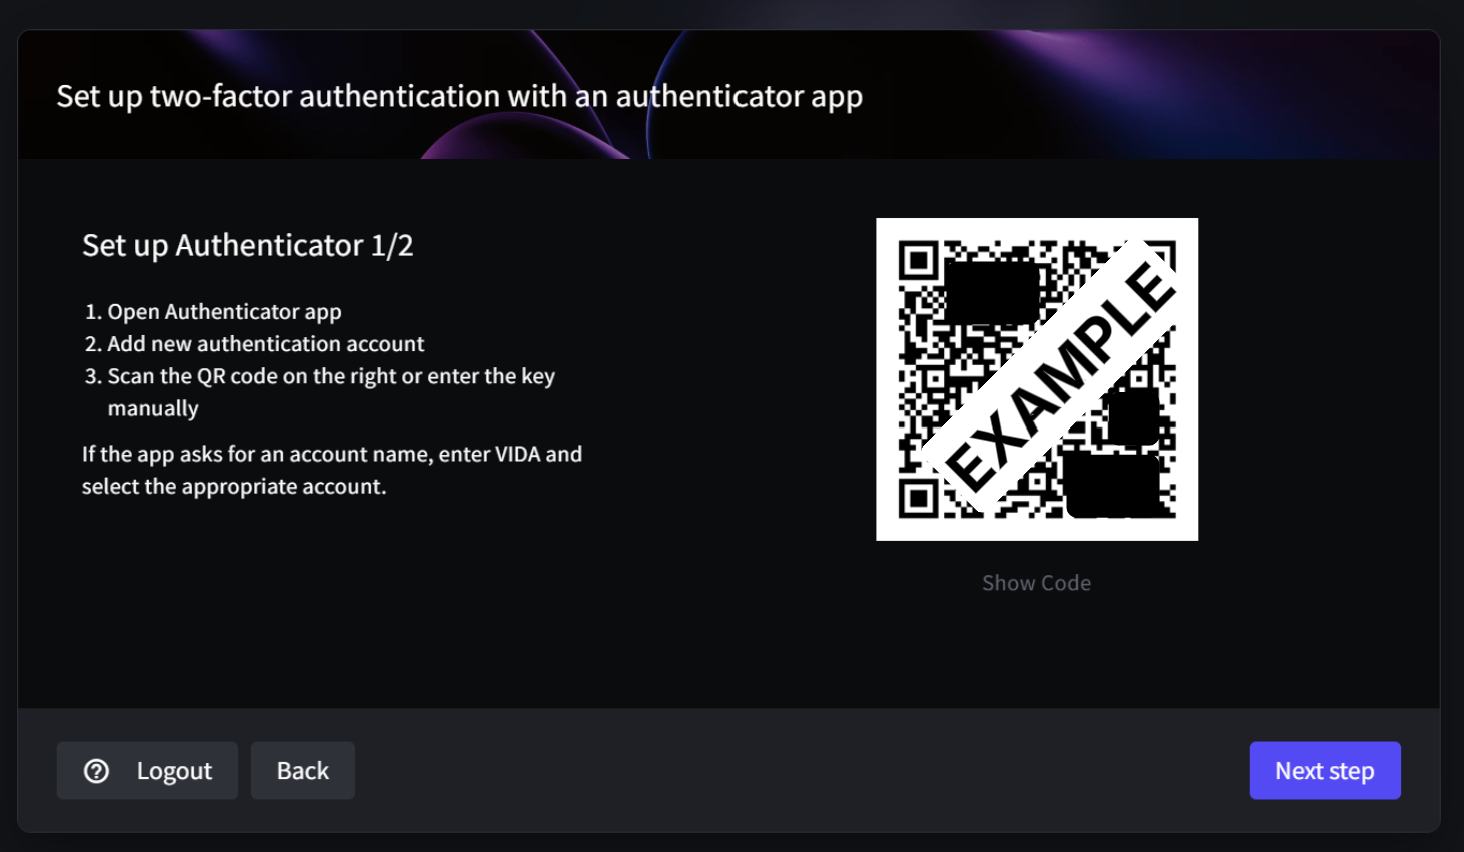
Step 4 — Scan the QR code with your authenticator app
If you selected "Yes, app installed", VIDA will display a QR code.
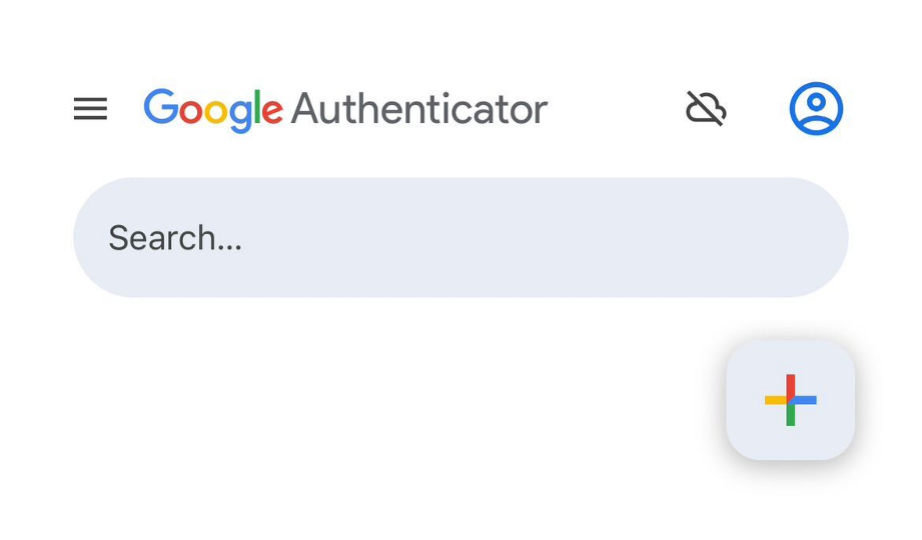
- Open your authenticator app on your phone.
- Look for an option such as Add, +, or Scan QR code.
- Use your phone to scan the QR code shown on the VIDA screen.
Once scanned, your authenticator app will create a new entry for VIDA and display a six-digit code.
Step 5 — Enter the code into VIDA
- Look at your authenticator app.
- Enter the six-digit code currently shown.
- Select Finalise.
The code refreshes every 30 seconds. Always enter the latest code shown in the app.
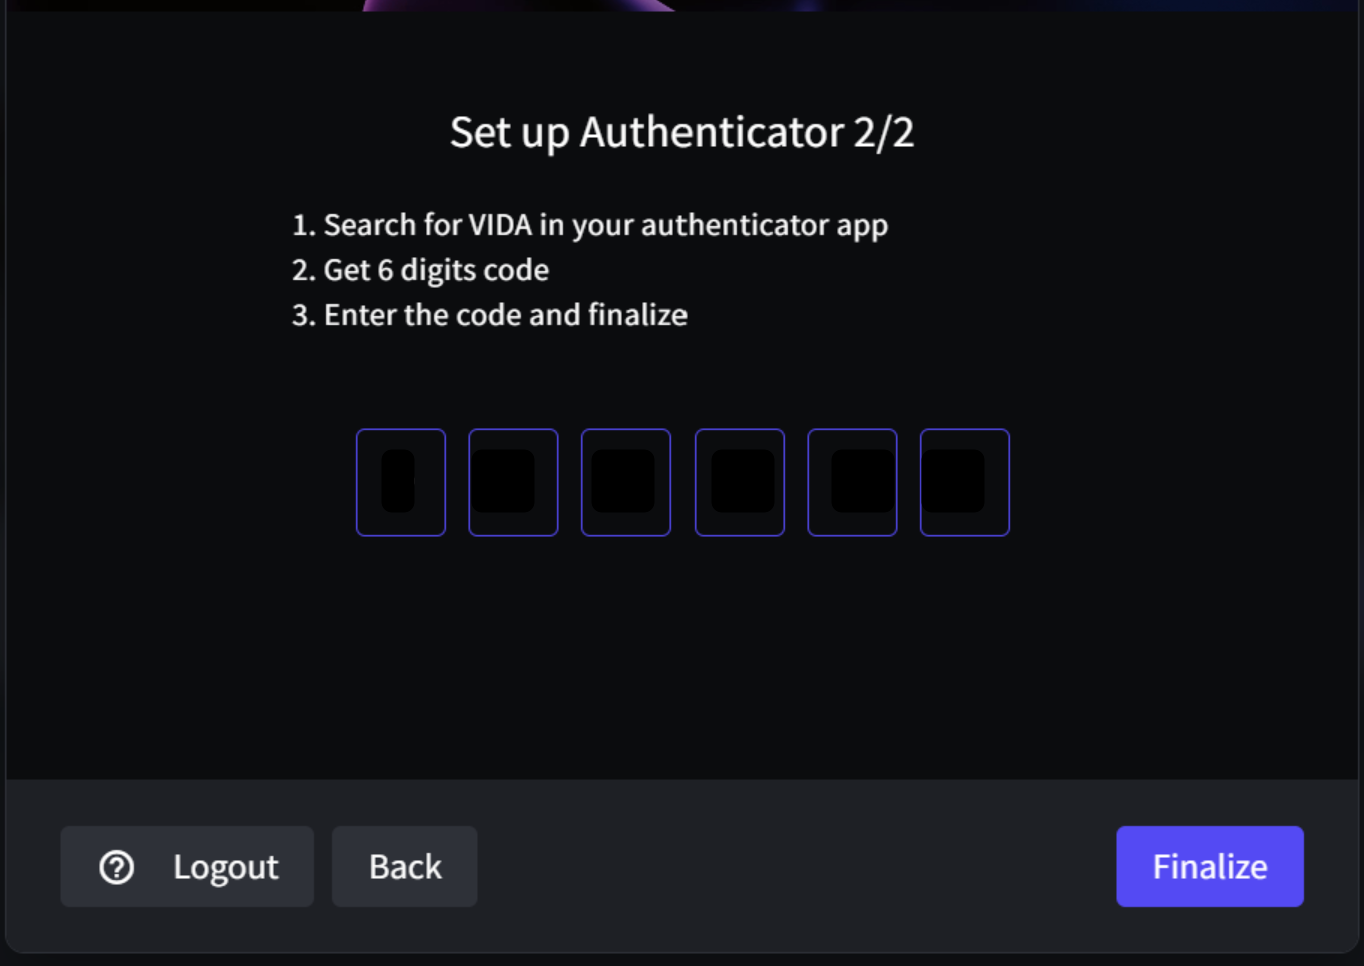
Once complete, you will be logged in and able to access VIDA.
You'll be asked to enter a new code each time you log in. You may also be asked to enter a code again mid-session — for example, when logging in from a new device or performing sensitive actions in VIDA.
Troubleshooting & FAQs
Yes. Every time you log in to VIDA, Launchpad, or Connect 2, you'll need to enter a new six-digit code from your authenticator app. You may also be asked for a fresh code mid-session — for example, when logging in from a new device or performing sensitive actions in VIDA.
Make sure you are entering the current code — if it doesn't work, wait for the code to refresh and try again. If it still doesn't work, try the following checks:
- Make sure you're logging in with your full email address.
- Use Google Chrome, where possible — this is our preferred browser.
- Try an Incognito (private) browser window.
- Confirm you're using the same phone you originally used to set up the authenticator app.
- Check that your phone's Date & Time settings are set to Automatic.
- Make sure your authenticator app is up to date.
- If you're using Google Authenticator, use its built-in time sync option, if available.
A code can be rejected for a few common reasons:
- The code has expired.
- An older code was entered after a newer one was requested.
- A browser or session mismatch — try an Incognito window to rule this out.
- The wrong account or entry was selected within the authenticator app.
- Copy/paste issues — try typing the code in manually instead.
VIDA shows a new QR code each time you reach the QR code screen. If you scanned one, then left the setup and came back, the new QR code does not match the entry already in your authenticator app. This happens if you went back, closed the window, reloaded the page, or had a failed login part-way through. Codes from the old entry are rejected with "Verification code is not valid".
You may also see this in your app:
- Microsoft Authenticator refuses the second scan and says the account already exists.
- Google Authenticator and Authy accept the second scan, so you end up with two entries called vida-app and it is easy to pick the wrong one.
To fix it:
- Open your authenticator app and find every entry named vida-app with your email address.
- Delete all of them.
- In VIDA, select "Yes, app installed" to show a fresh QR code.
- Scan the QR code and enter the six-digit code from the new entry.
- Stay on the same screen from scanning to entering the code. Do not go back, close the window or reload the page in between.
If the code is still rejected after this, follow the checks above or contact us using the details at the end of this article.
No. Authenticator apps work offline.
Contact your VIDA administrator or raise a support ticket to request a 2FA reset with them on copy. Resetting 2FA may require approval from your organisation's administrator before it can be completed.
Contact your VIDA administrator or raise a support ticket. To help us investigate quickly, please include:
- A full-screen screenshot, including the browser and address bar.
- The exact error message shown.
- Your email address.
- The time of the failed attempt.
- Whether this is your first login, or you've logged in successfully before.
- Your organisation's main VIDA contact or administrator, if known.
Was this article helpful?
That’s Great!
Thank you for your feedback
Sorry! We couldn't be helpful
Thank you for your feedback
Feedback sent
We appreciate your effort and will try to fix the article