Launchpad: How to Update Metadata
Update metadata on a single asset, or on multiple assets at once using Batch Update.
Overview
In Launchpad, files can be updated with metadata at either single asset level or multi-asset (batch) level. Choose the method that best suits your task.
| Method | Best used for |
|---|---|
| Single Asset Update | Editing metadata on one asset at a time, including asset-specific notes. Navigation arrows let you move straight to the next asset without returning to the grid. |
| Batch Update | Applying the same value across many assets in one go — for example, setting the same Season Number or Series Title across every episode in a batch. |
Before You Begin
Which metadata fields are required is determined by your organisation's configuration in Launchpad, so the fields you see may differ from those in another VIDA workspace. If you're unsure which fields are required for your workflow, check with your organisation's Launchpad administrator or content team before updating metadata.
Whatever your organisation's specific requirements, we recommend filling in at least the following fields for every asset:
- Title
- Season Number and Episode Number (if the asset is episodic)
- Language
Metadata fields may be a mix of controlled drop-down menus, with a fixed set of values to choose from, and free-text fields, where any value can be entered. Which type applies depends on how each field has been configured for your organisation.
Step-by-Step Instructions
Single Asset Update
- Scroll to the bottom of the page to locate your assets.
- Hover over the required file.
- Click the pencil icon on the right-hand side.
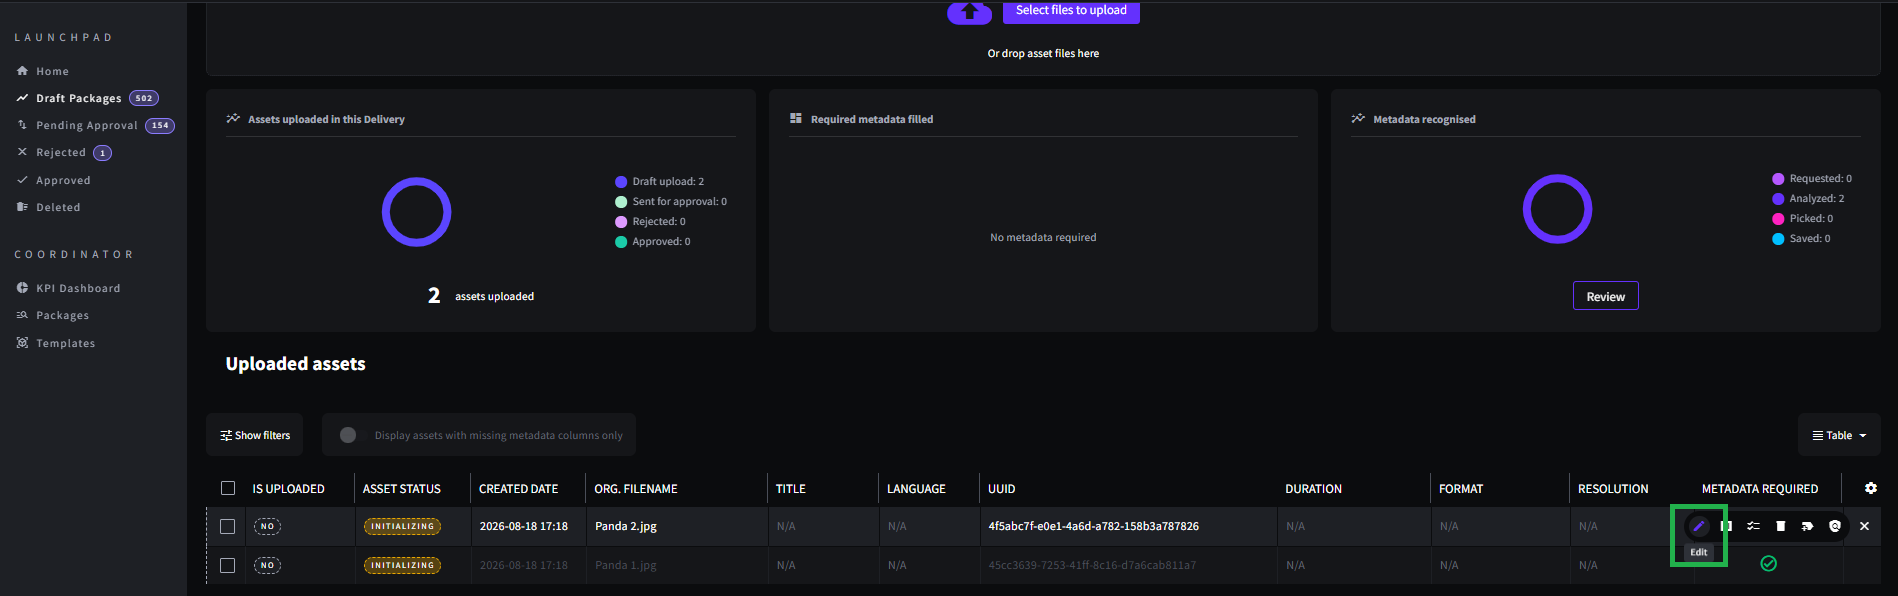
- A pop-up will appear where metadata fields can be edited.
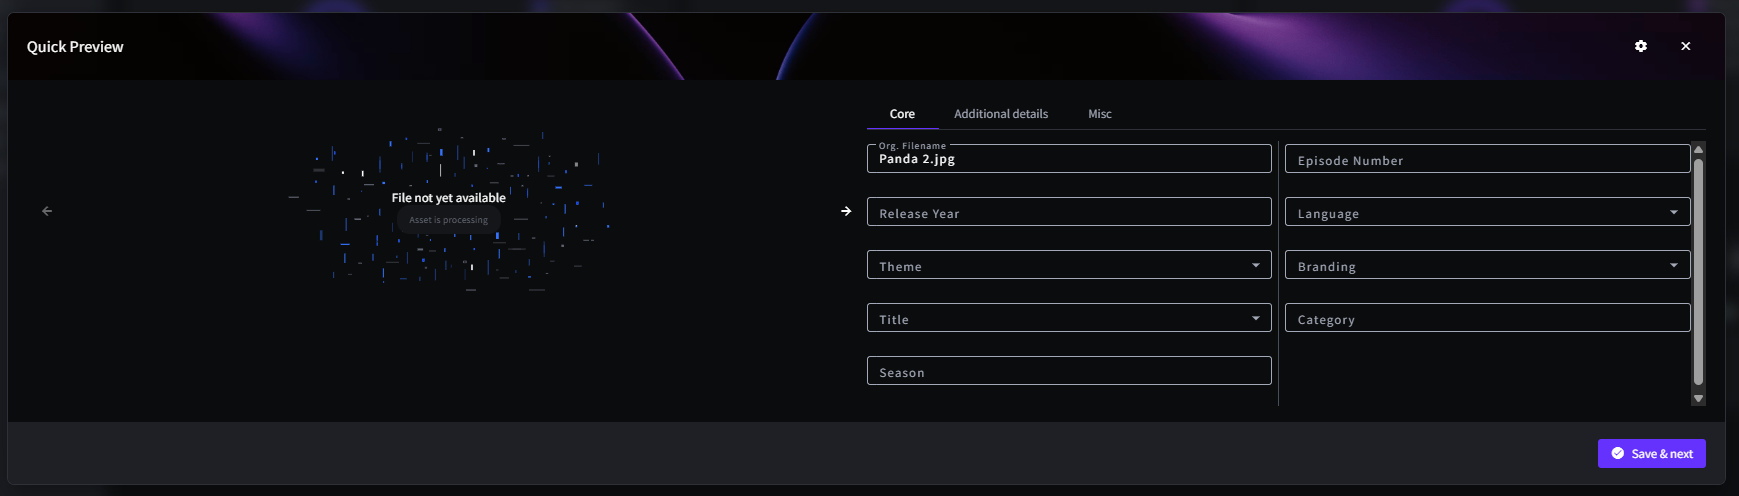
- Use the Notes field in the pop-up to record any comments specific to that asset.
- Use the navigation arrows in the pop-up to move to the previous or next asset, or click Save and Next to save your changes and move straight to the next asset without returning to the grid.
Batch Update (Multiple Assets)
- Scroll to the bottom of the page to locate your assets.
- Select the required files.
- Click the Batch Update button at the bottom left of the page.
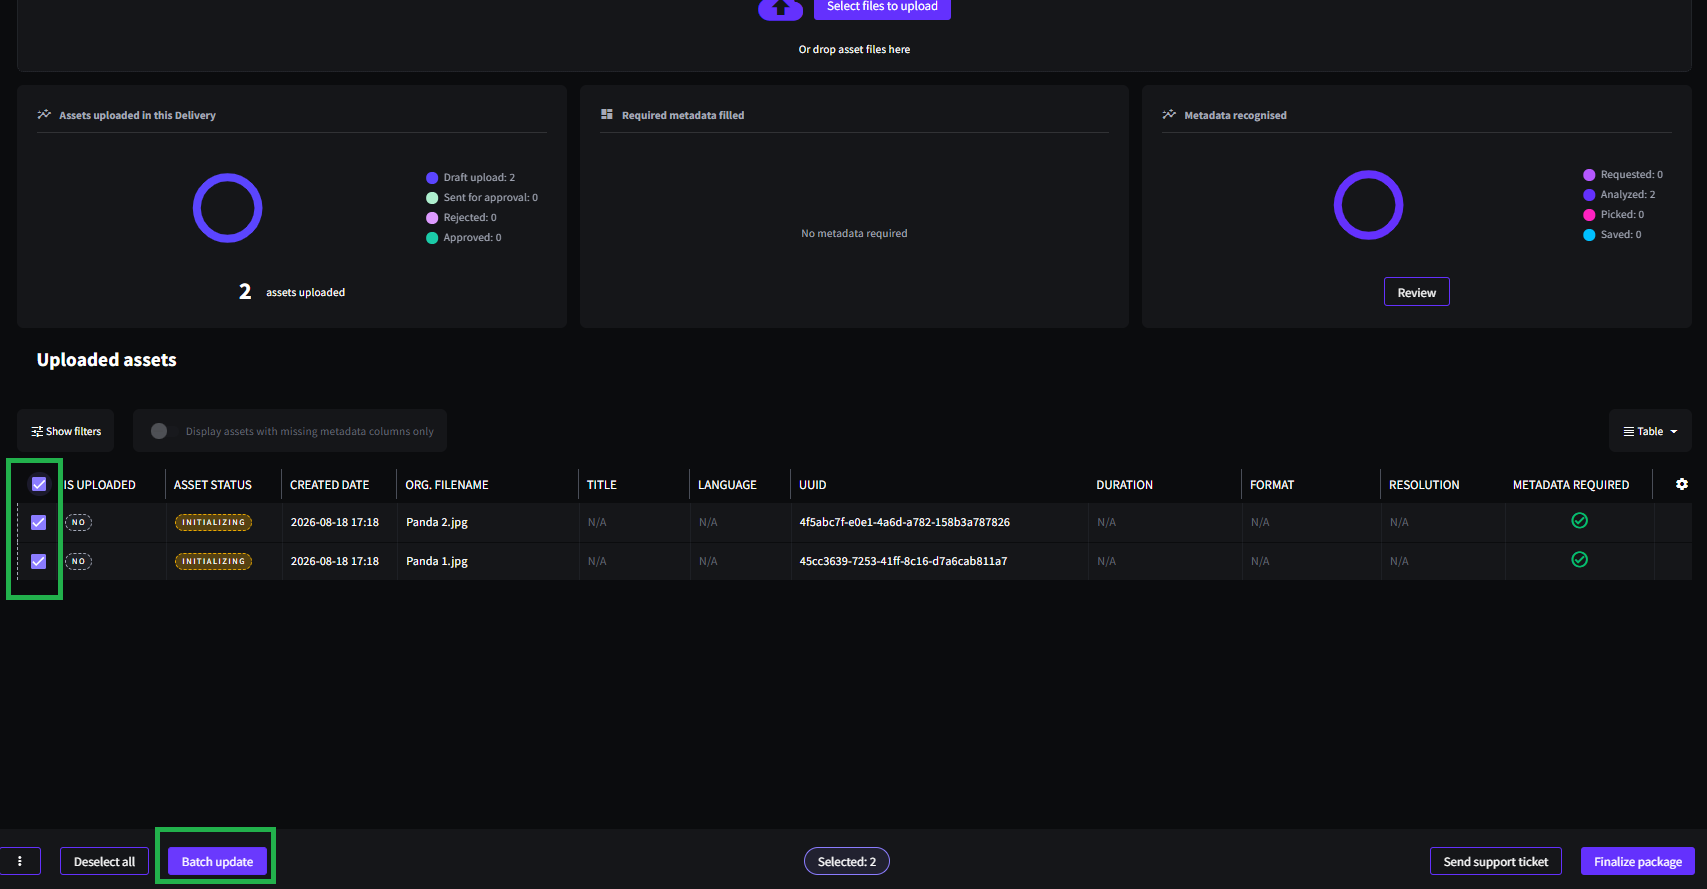
- A pop-up will appear where metadata fields can be edited.
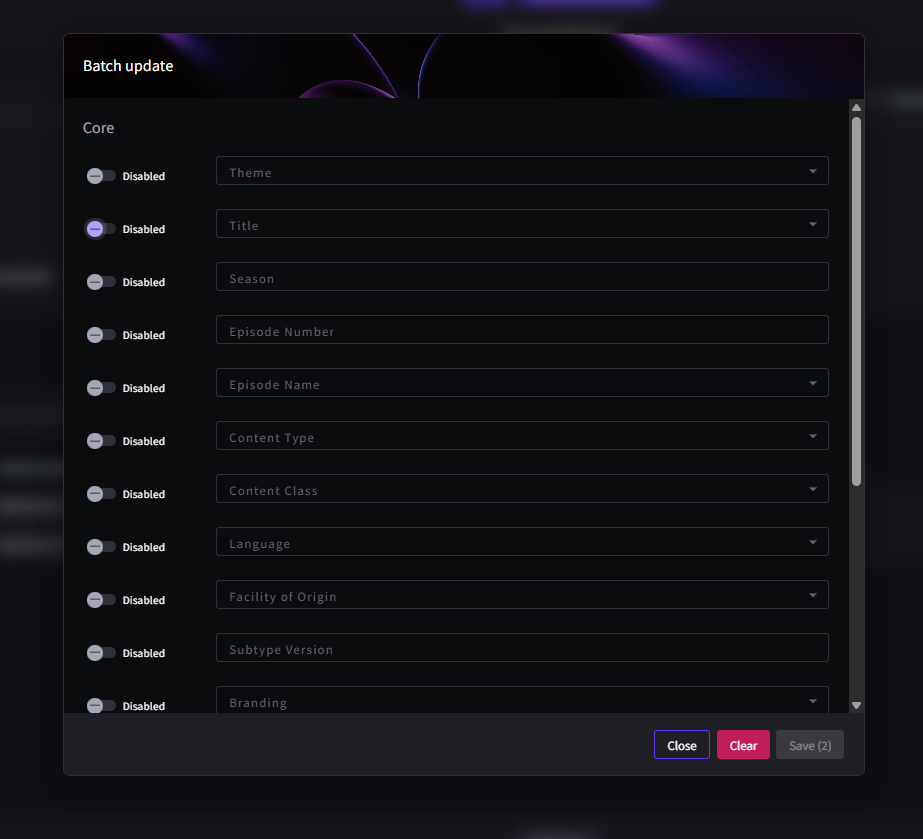
When using Batch Update, any field that is toggled on will apply the selected value to all chosen assets.
Batch Update is particularly handy when a value should be the same across many assets — for example, updating the Title or Season Number across every episode in a season at once, instead of editing each asset individually.
Troubleshooting & FAQs
Single Asset Update edits metadata for one asset at a time, with navigation arrows to move to the next asset and save your changes as you go. Batch Update applies the same metadata value to every asset you've selected in a single action, which is useful for changes like updating a Season Number or Series Title across many episodes at once.
No. Batch Update applies the same value to every selected asset, so it isn't suitable for asset-specific comments. Use Single Asset Update instead, and add your comments in the Notes field within that asset's metadata pop-up.
The metadata fields available in Launchpad depend on your organisation's configuration. Fields are set up per client, so what you see reflects the schema configured for your workspace.
Yes. When editing a single asset, use the navigation arrows in the metadata pop-up, or click Save and Next to save your current changes and move straight to the next asset.
Related Articles
Was this article helpful?
That’s Great!
Thank you for your feedback
Sorry! We couldn't be helpful
Thank you for your feedback
Feedback sent
We appreciate your effort and will try to fix the article